Site Update Activity Report
The Site Activity Report provides a snapshot of the freshness of the content on your Web site. Specifically, it lists how many content items were published within a folder and date range you select, broken down by folder.
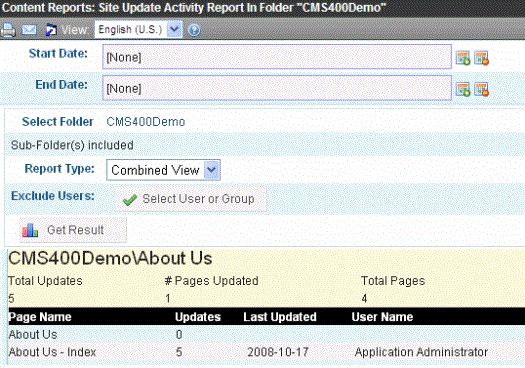
A sample report appears below.

Selecting Information to Appear on the Report
To choose which content items will appear on the report, follow these steps.
1. By default, only content in the default language appears on the report. To change the language, use the language pull-down near the top of the screen.
2. Choose a Start Date by clicking the calendar icon (
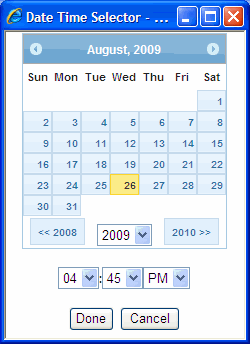
3. A calendar appears. You can move to another month or year by clicking it. When you get to the desired month, click inside the day. The selected date turns red (see below).

4. Click Done.
5. If desired, select an End Date using the same procedure.
Note: If you do not select an end date, the report uses today as the end date.
6. At the Select field, choose a folder. The Root folder is the default selection.
Note: Only folders for which you have read-only or greater permission appear.
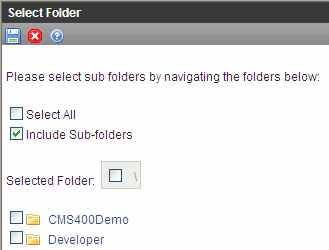
To change that selection, click the folder name. When you do, the Select Folder screen appears.

To select all folders on the screen, click the Select All checkbox. Otherwise, select folders by clicking the corresponding checkbox. There is also an option to Include Sub-folders of the selected folders.
7. Choose the Report type, which determines the information you will see on the report. Options are explained below.
|
Report Type |
Description |
|
Detail View |
name of each page that was published how many times it was published date it was last published users who published page total numbers are not provided |
|
Detail View Example |
|
|
Combined View |
information from Executive and Detail views |
8. If you would like to exclude users or use groups from the report, use the Exclude Users field. For example, you want to see all updates other than those you have completed.
When you click Exclude Users, an alphabetical list of users appears, followed by user groups. (User groups have a two- headed icon ( )).
)).
9. Click Get Result.


